How to Use GetWhoisDB — Step-by-Step Setup & Usage Guide
Guide

How to Use GetWhoisDB SAAS

Follow these simple steps to set up your account, analyze domains, and start sending email campaigns.

1

Create Your Account

Start by creating your free GetWhoisDB-SAAS account. You get a 1-month free trial with all Starter plan features.
1.1 Go to www.saas.getwhoisdb.com and click "Get Started Free"
1.2 Fill in your name, email, select your country, and set a password
1.3 Verify your email address by clicking the link we send you
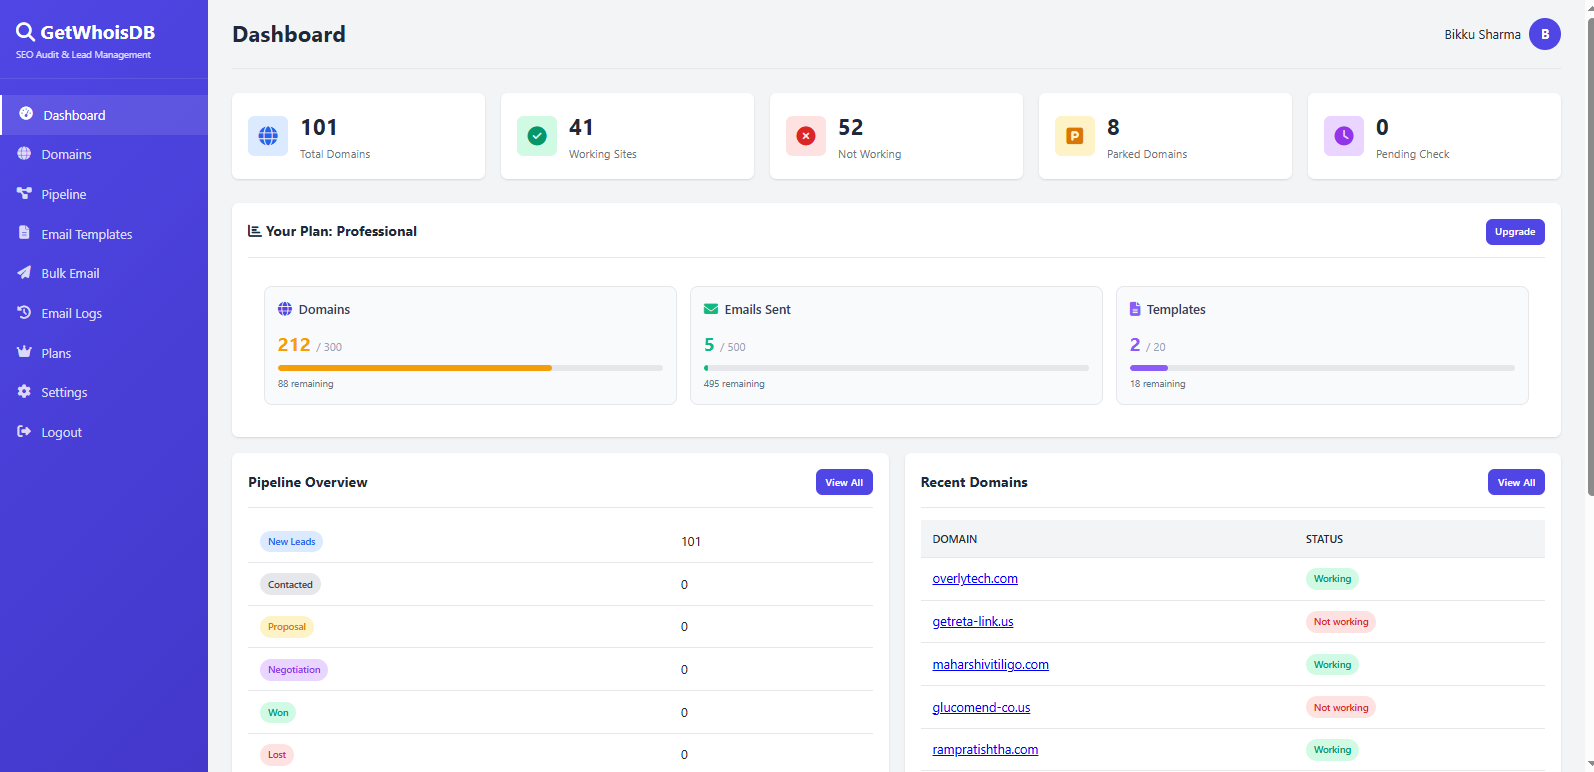
1.4 Log in and you'll see your dashboard
Registration page
2

Set Up SMTP (Email Sending)

Before sending emails, you need to configure your SMTP settings. You can use Gmail, Outlook, Yahoo, or any SMTP provider.

2.1 Go to Settings from the sidebar menu
2.2 Scroll down to the SMTP Settings section
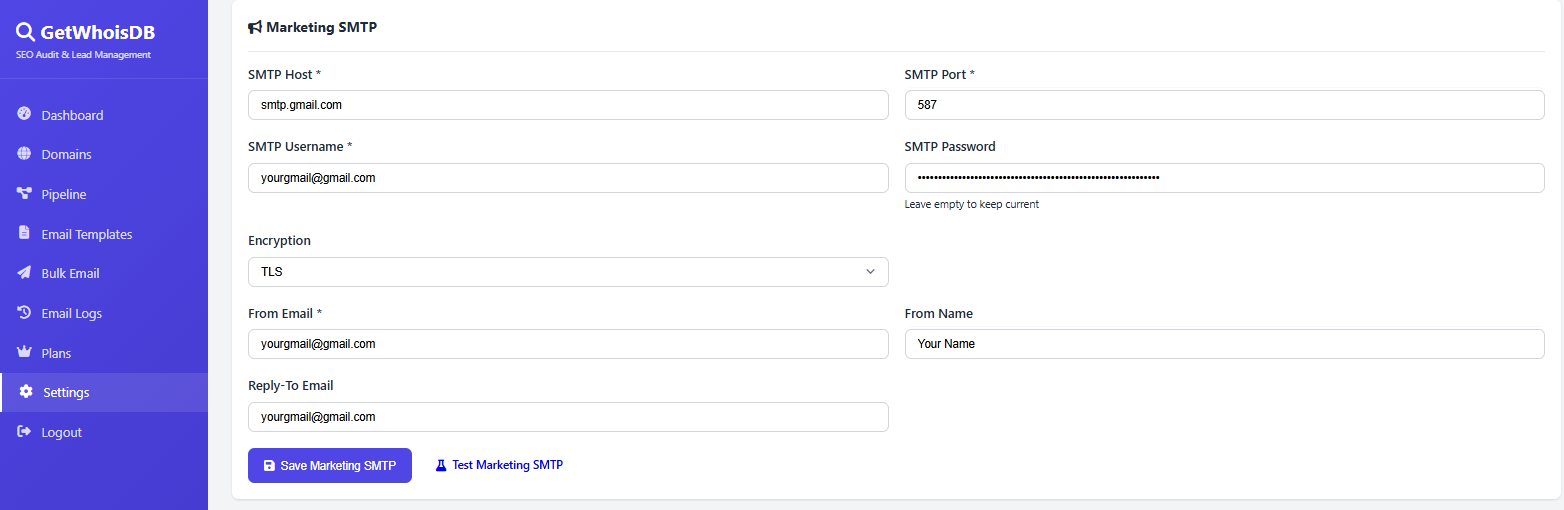
2.3 Choose your email provider and enter the SMTP details
Provider SMTP Host Port Notes
Gmail smtp.gmail.com 587 Use App Password (not your regular password)
Outlook smtp.office365.com 587 Use your Outlook/Microsoft account password
Yahoo smtp.mail.yahoo.com 587 Use App Password (not your regular password)
Zoho smtp.zoho.com 587 Enable "Less Secure Apps" or use App Password
Custom SMTP Your SMTP host 587 or 465 Ask your email provider for details
Gmail Users: Go to Google App Passwords, create a new app password, and use that instead of your Gmail password. Regular passwords won't work.
2.4 Enter your SMTP Host, Port, Username (your email), and Password
2.5 Set the From Name (what recipients see) and From Email
2.6 Click "Save SMTP Settings"
2.7 Click "Test SMTP" to send a test email and verify it works
SMTP settings
3

Add Domains

There are two ways to add domains — manually one by one, or bulk upload via CSV file.

Option A: Add Domain Manually

3.1 Go to Domains from the sidebar
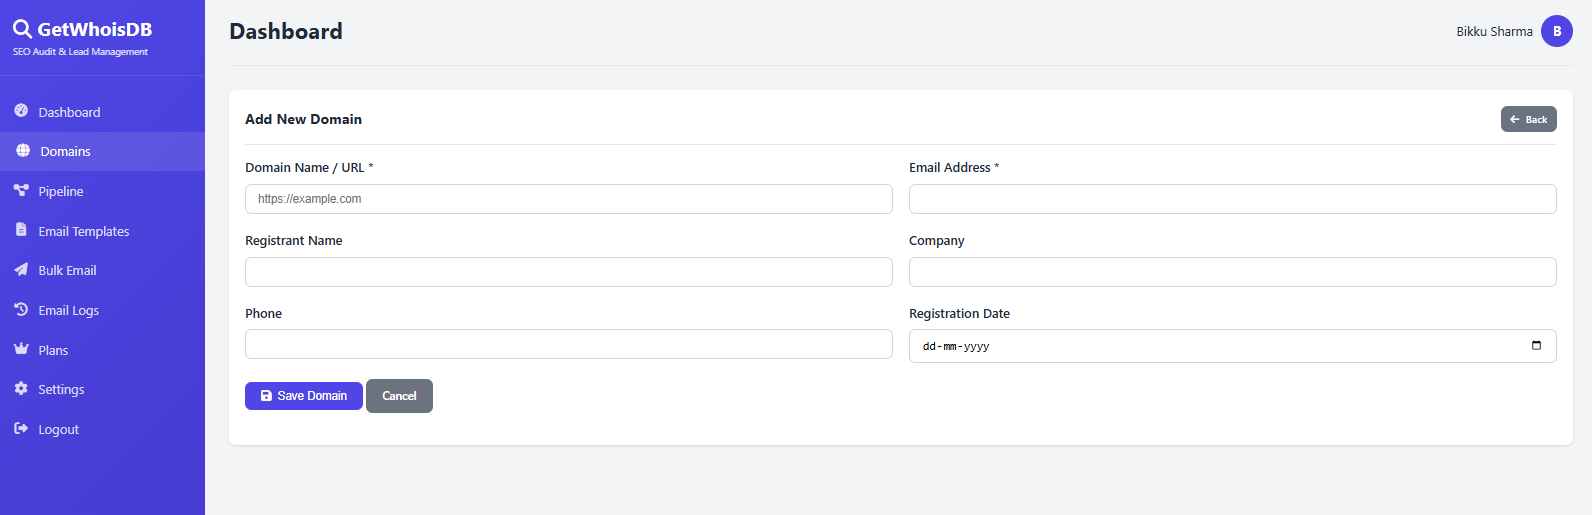
3.2 Click "Add Domain" button
3.3 Enter the domain name (e.g., example.com)
3.4 Click "Add Domain" to save
Add domain form

Option B: Bulk Upload via CSV

3.5 Go to Domains and click "Upload CSV"
3.6 Create a CSV file with one column: domain (header row required)
3.7 Example CSV format:
domain
example.com
google.com
amazon.com
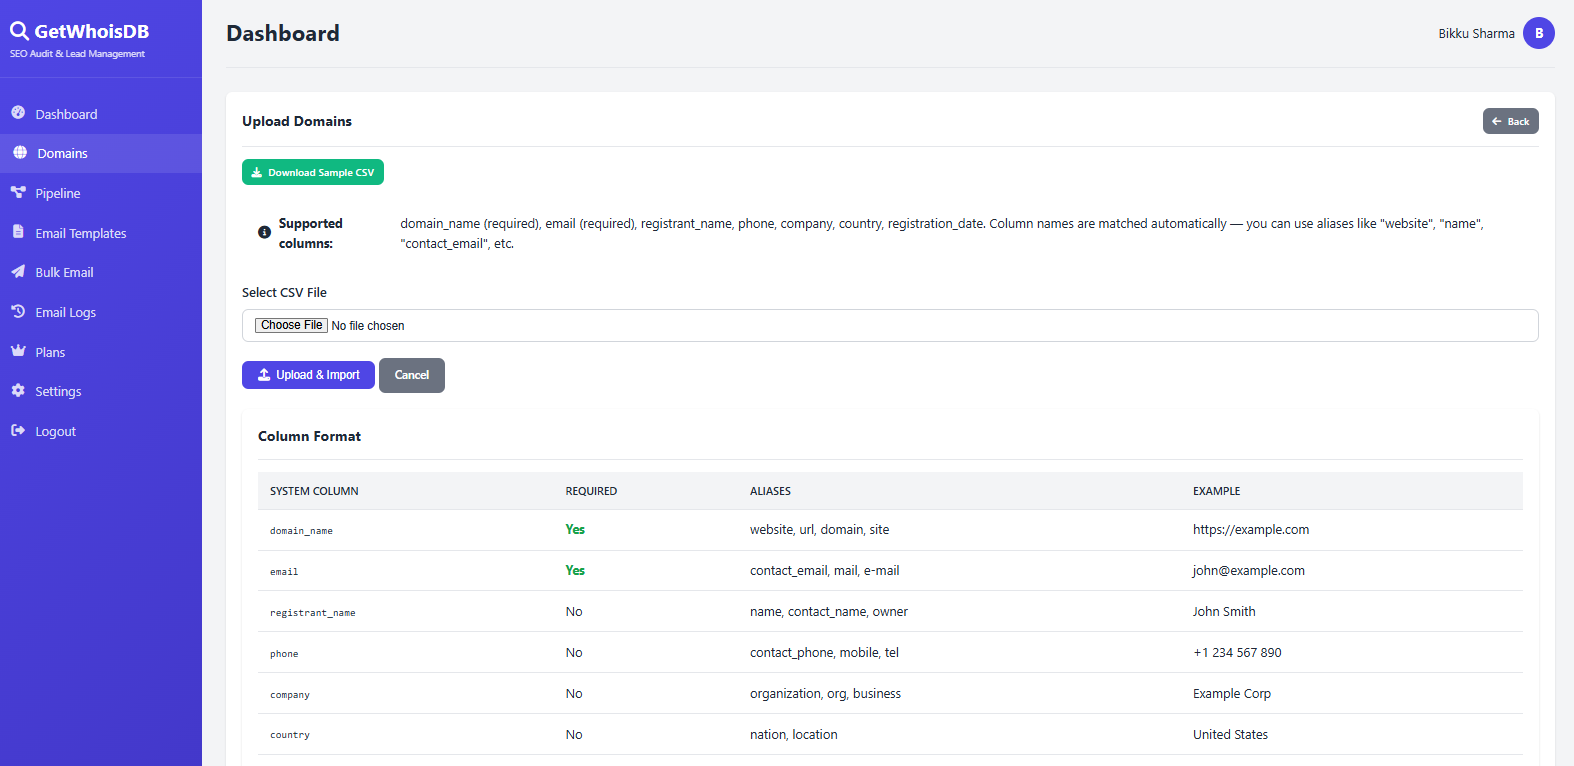
3.8 Select your CSV file and click "Upload"
3.9 All domains will be added instantly (audit runs later when you check status)
CSV upload
4

Check Domain Status & Run SEO Audit

After adding domains, check their status and run a full SEO audit to get detailed reports.

4.1 Go to Domains page
4.2 Click "Check Status" button next to any domain
4.3 The tool will check if the website is Working, Parked, or Not Working
4.4 An SEO audit runs automatically and generates a score (0-100)
4.5 Click on any domain to view the full detailed report
4.6 To check multiple domains at once, select them with checkboxes and click "Check Selected"
4.7 Progress bar shows how many domains have been checked

Understanding Status Results

Working

Website is live and has real content. Ready for outreach.

Parked

Domain is parked or for sale. Not a real website.

Not Working

Website is down, doesn't load, or returns an error.

SEO Report Includes

  • Technical SEO (robots.txt, sitemap, response codes)
  • On-Page SEO (titles, meta descriptions, headings)
  • Mobile Optimization (viewport, responsiveness)
  • Security (SSL, HTTPS, mixed content)
  • Content Quality (word count, links, images)
  • Performance (page load, server response time)
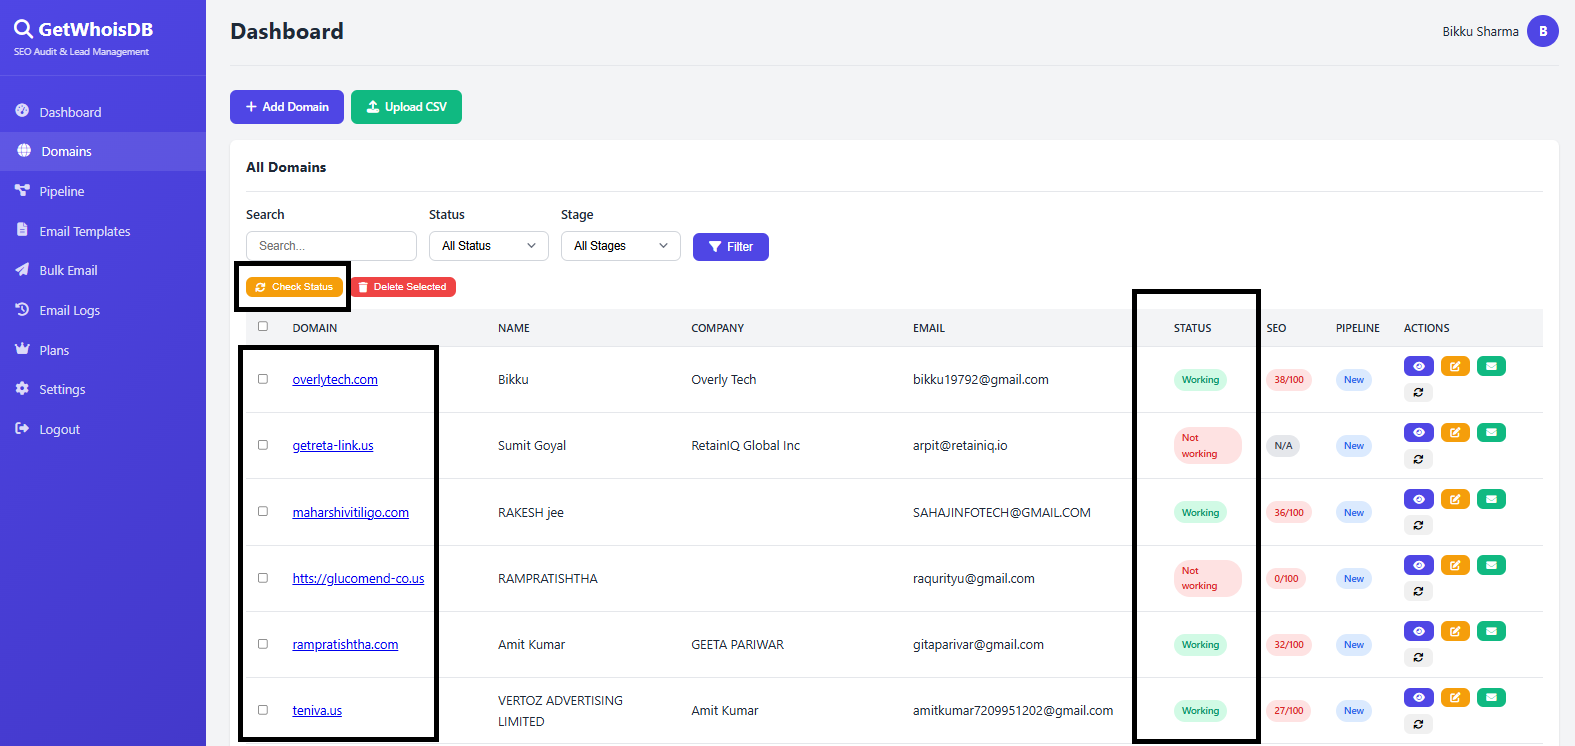
Domain list
5

Create Email Templates

Create reusable email templates for your outreach campaigns. You can create multiple templates for different purposes.

5.1 Go to Email Templates from the sidebar
5.2 Click "Add Template"
5.3 Give your template a name (e.g., "SEO Services Outreach")
5.4 Write your email subject and body
5.5 Use {domain} as a placeholder — it will be replaced with the actual domain name when sending
5.6 Click "Save Template"
Example: "Hi, I noticed {domain} could benefit from better SEO. We offer a free audit..." — the {domain} part gets replaced with the actual domain when email is sent.
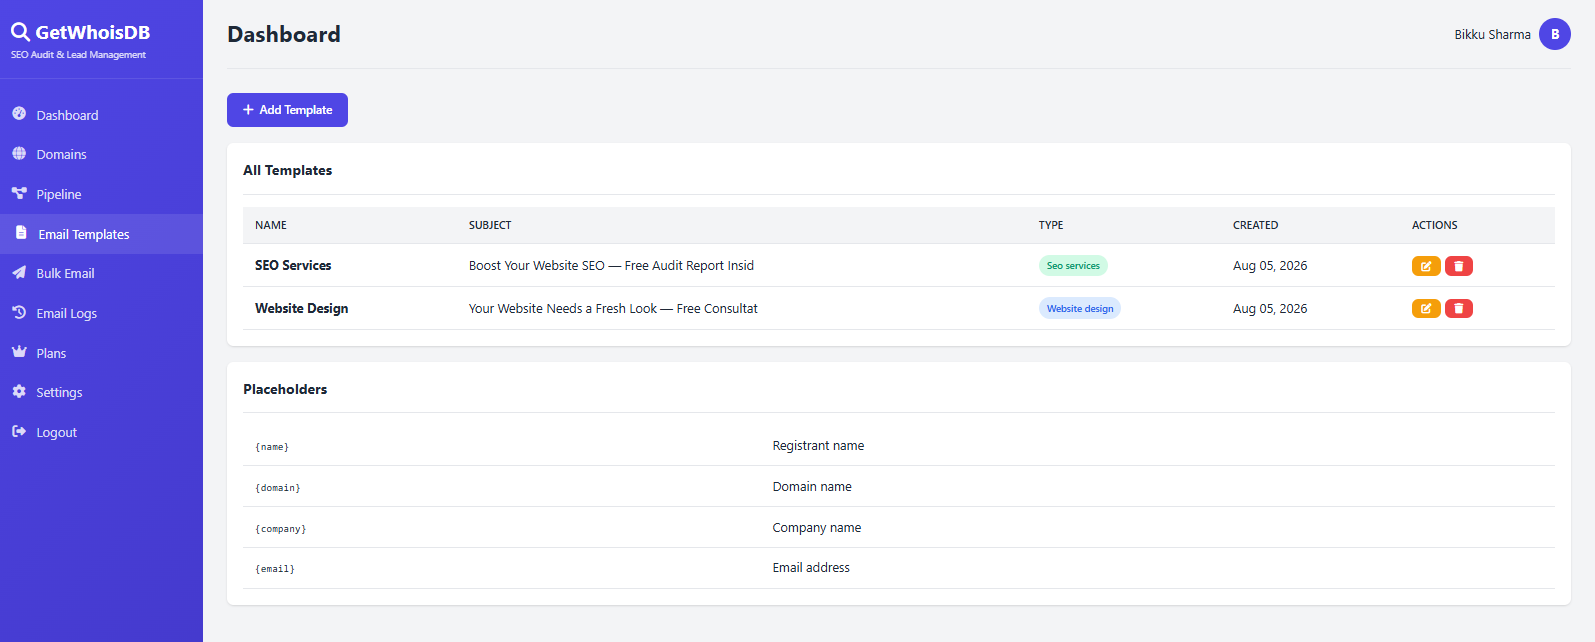
Email template
6

Send Single Email

Send a targeted email to a specific domain contact from the domain detail page.
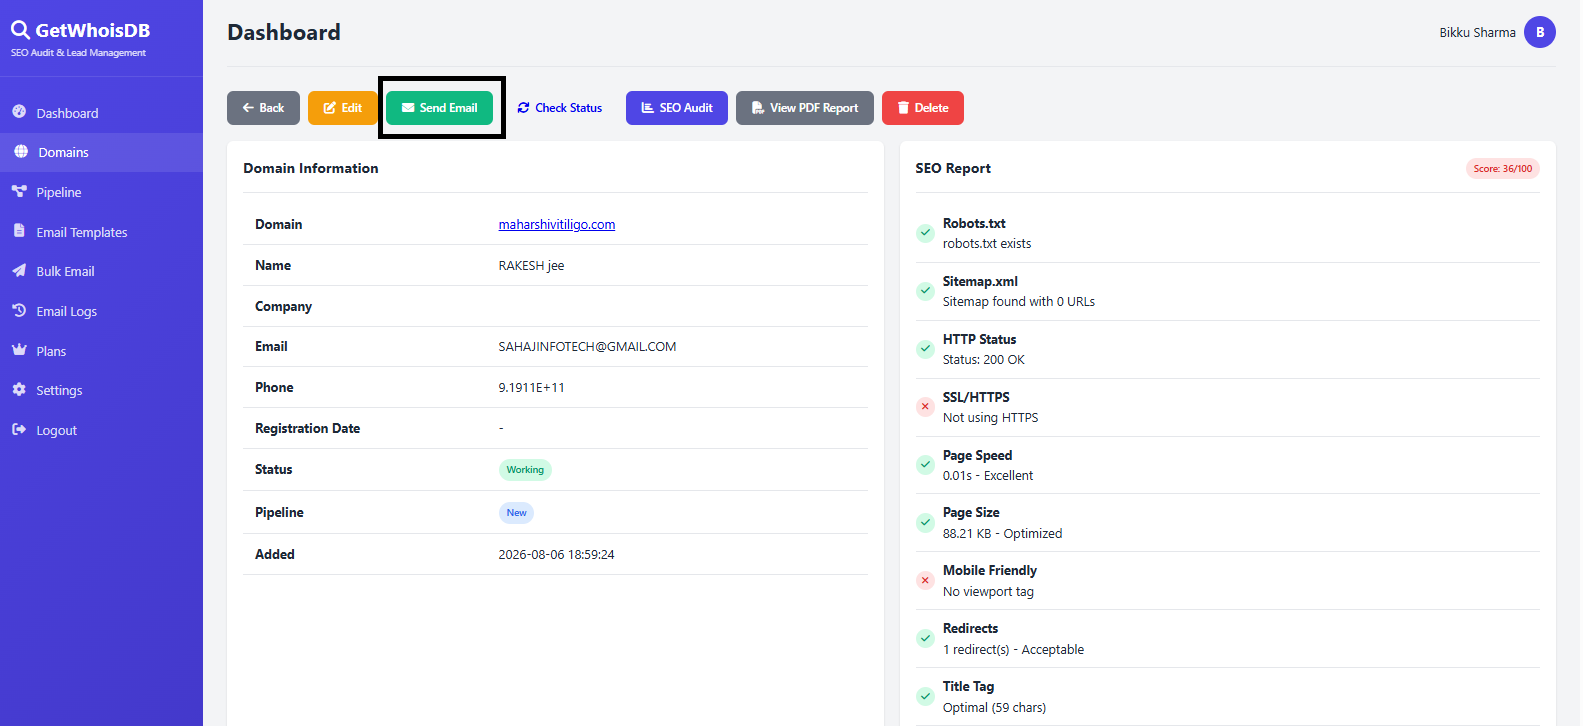
6.1 Go to Domains and click on any domain name
6.2 On the domain detail page, scroll to the "Send Email" section
6.3 Enter the recipient's email address
6.4 Select a template or write a custom email
6.5 Click "Send Email"
Send email
7

Send Bulk Email Campaigns

Send emails to multiple domains at once. The tool automatically picks the right template and sends personalized emails.

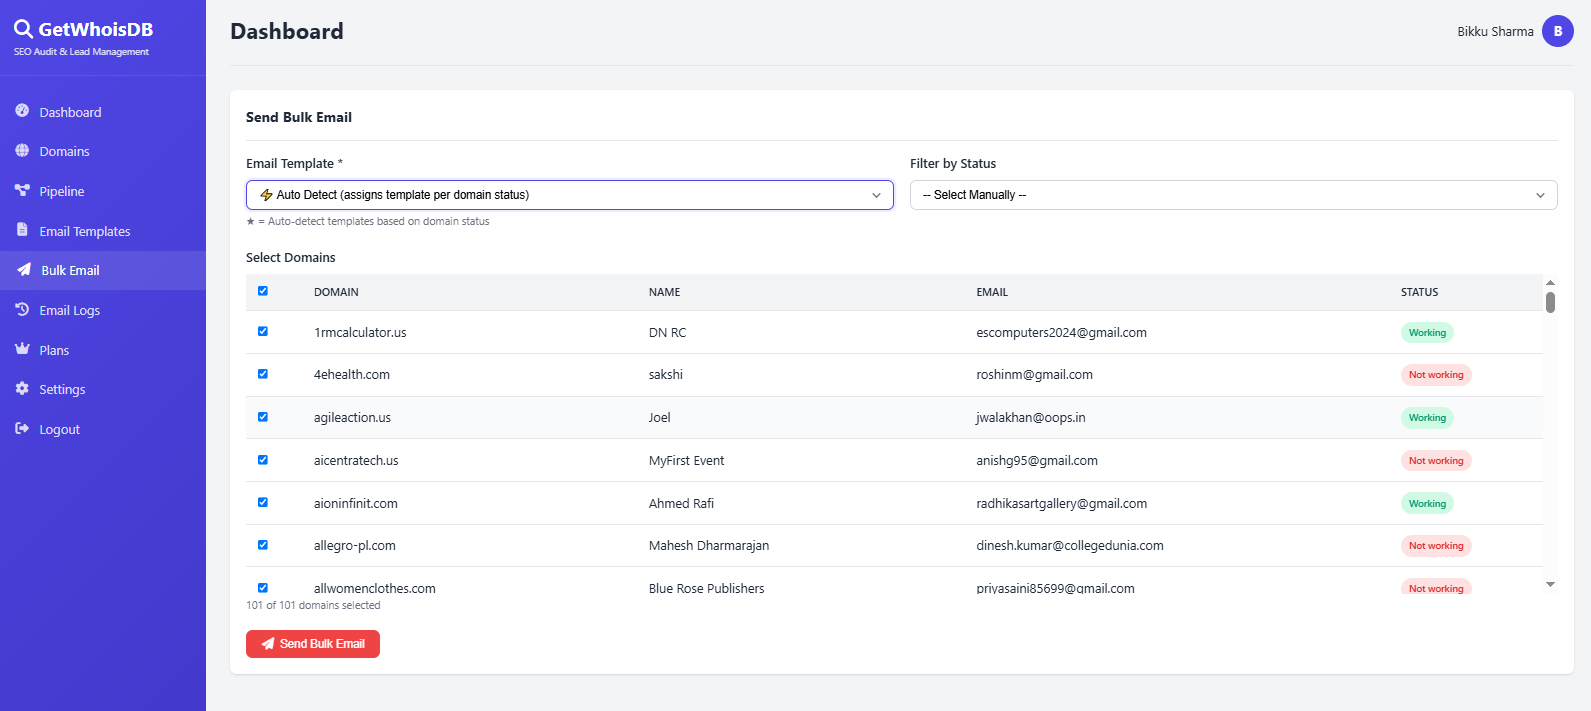
7.1 Go to Bulk Email from the sidebar
7.2 Select the domains you want to email (or select all)
7.3 Choose an email template from the dropdown
7.4 Preview the email — check that {domain} placeholders look correct
7.5 Click "Send Bulk Email"
7.6 Emails are sent one by one with a delay to avoid spam filters
Tip: Check your Email Logs page after sending to see delivery status and track email opens.
Bulk email
8

Manage Your Sales Pipeline

Track leads through your sales process with the visual Kanban board.
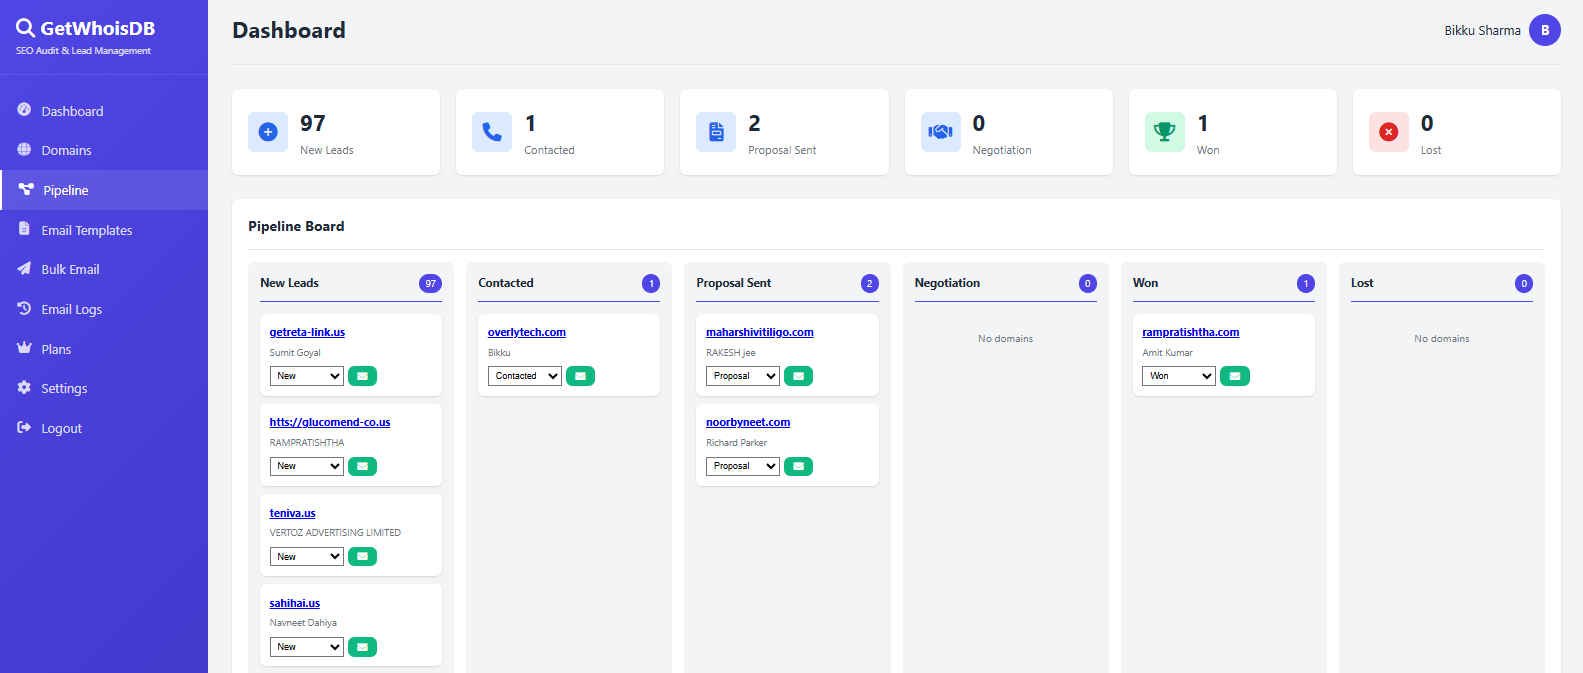
8.1 Go to Pipeline from the sidebar
8.2 See all your leads organized in columns: New LeadContactedProposal SentNegotiationWon / Lost
8.3 Drag and drop leads between columns to update their status
8.4 Add notes to each lead for context
Sales pipeline
9

Download PDF Reports

Generate professional PDF reports for any domain — perfect for sharing with clients.
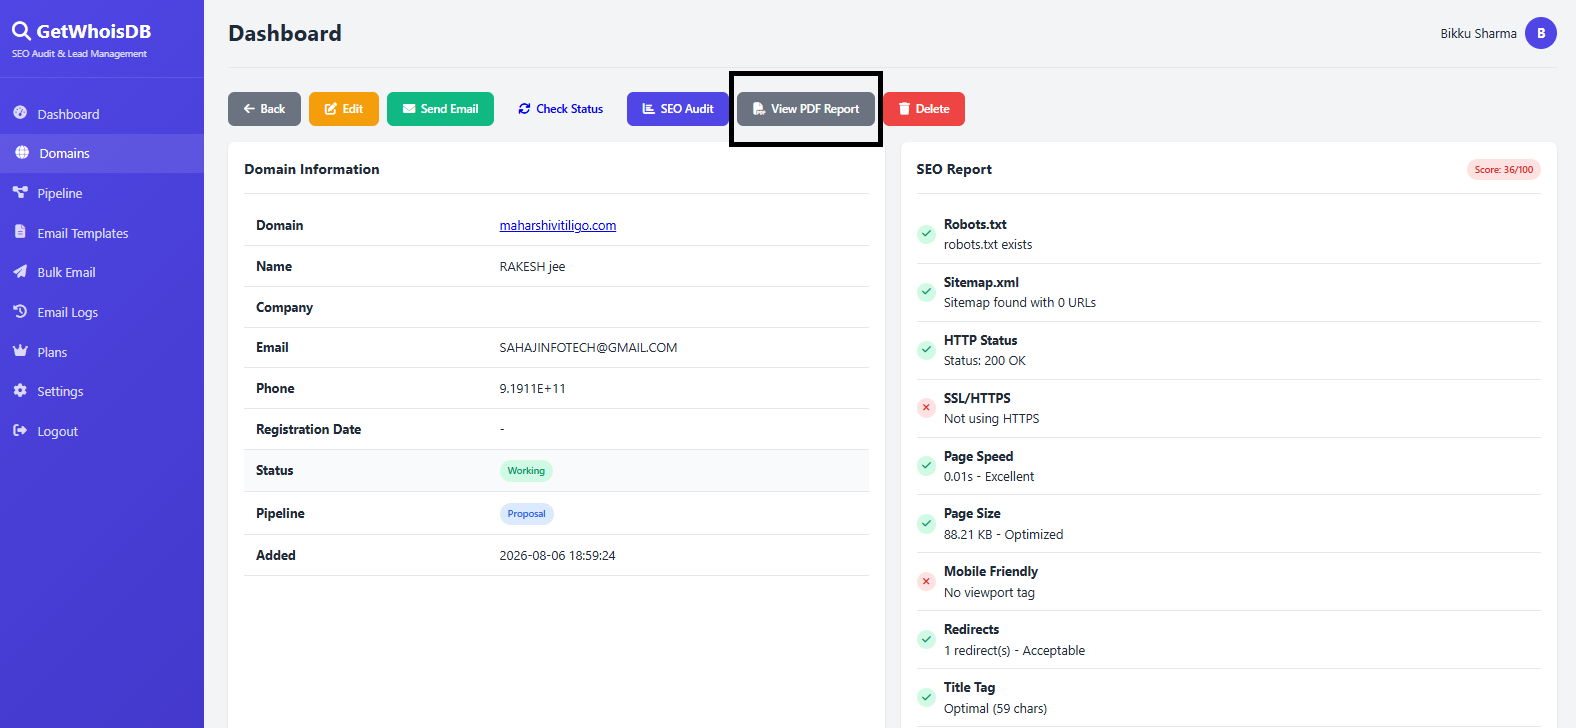
9.1 Go to any domain's detail page
9.2 Click "Download PDF Report"
9.3 A 5-page professional PDF is generated with your branding
9.4 Customize your logo and company name in Settings
PDF report

Quick Reference

Workflow

  1. Set up SMTP
  2. Add domains (manually or CSV)
  3. Check status & run audit
  4. Create email templates
  5. Send bulk emails
  6. Track in pipeline
  7. Download PDF reports

Need Help?

Contact Us — We're happy to help with setup.
View Plans — Upgrade for more domains & emails.

Ready to Get Started?

Create your free account and start analyzing domains in minutes.

Start Free Trial